
Getting started
Up and running in minutes
No configuration, no cloud account. Install, save your first layout, and you're done.
"Every app returns to its Space and every window lands in position — across monitors, apps, and Spaces." — Mac Workspaces, "Restore with one click"
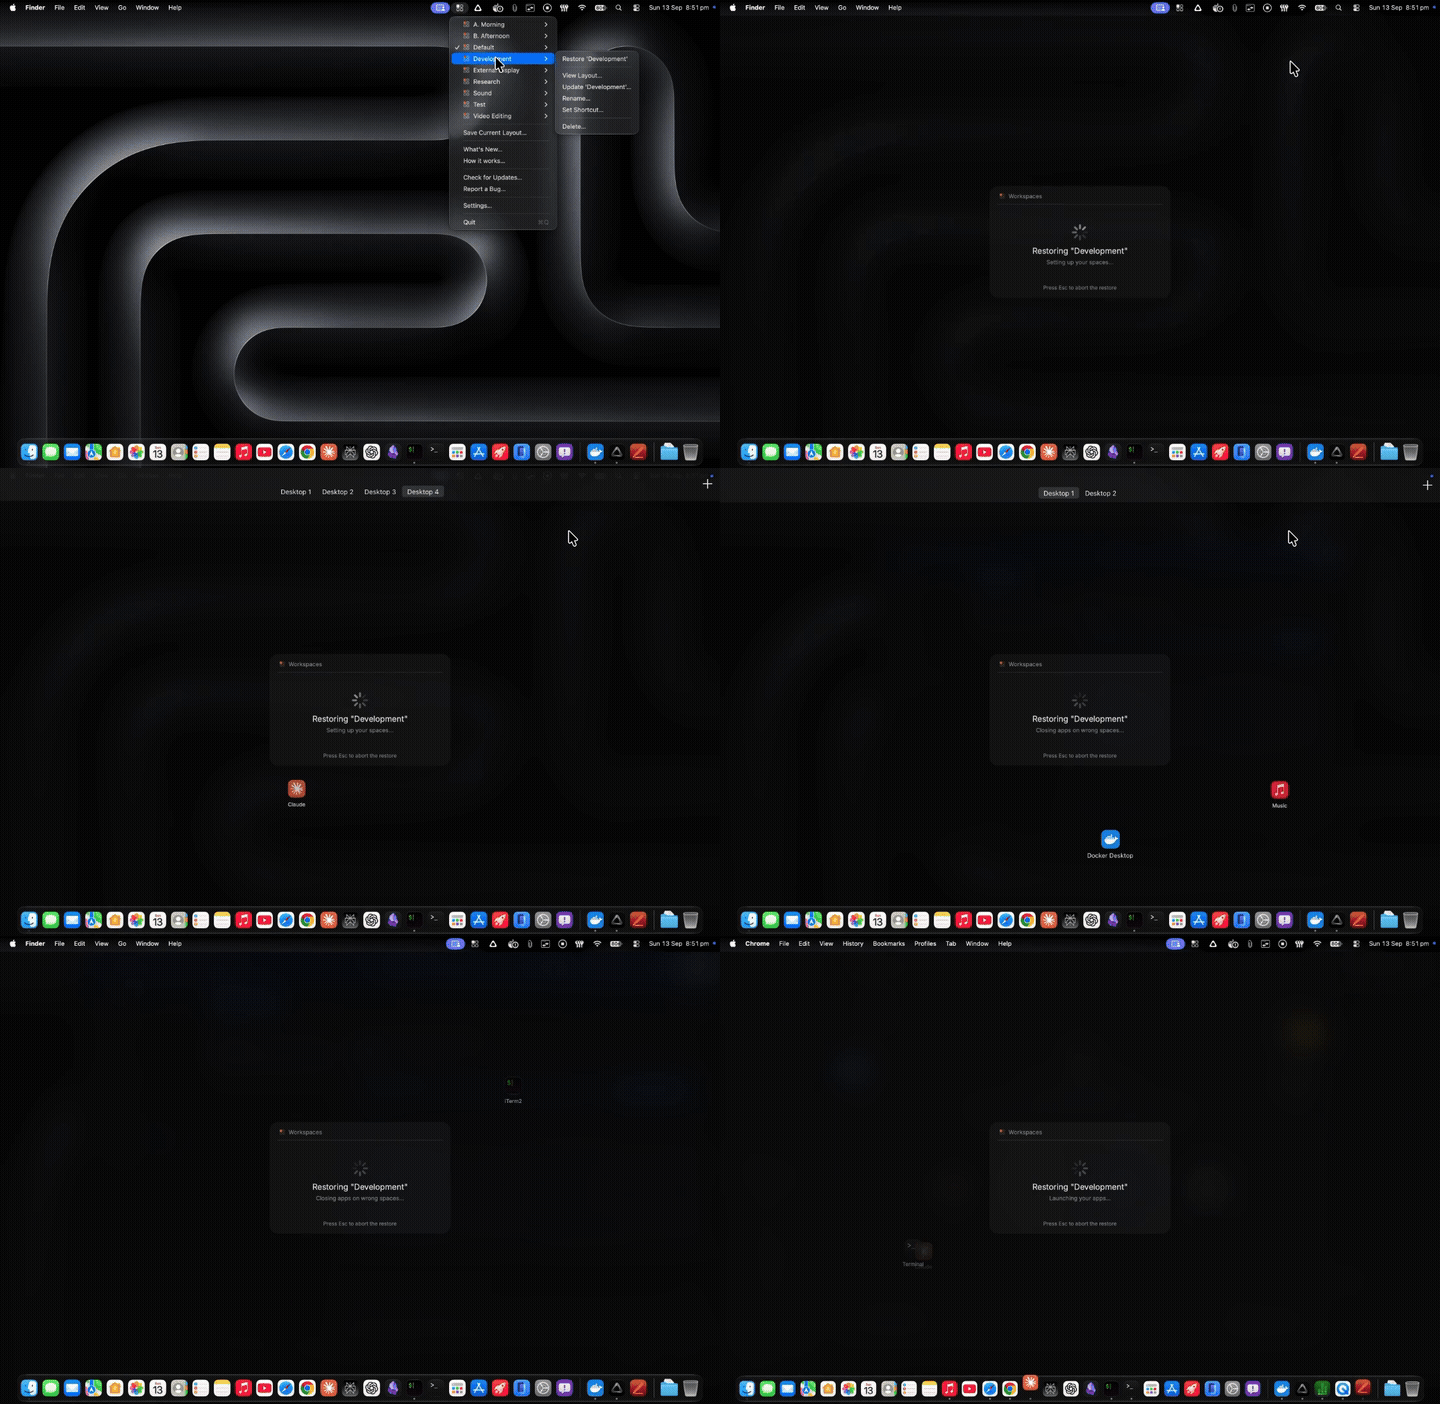
Restoring a saved layout, real time.
Video transcript
The Workspaces menu bar icon is clicked, opening the list of saved profiles — A. Morning, B. Afternoon, Default, Development, External Display, Research, Sound, Test, and Video Editing. Hovering "Development" opens its submenu, and "Restore 'Development'" is selected. A progress panel appears reading "Restoring 'Development' — Setting up your spaces…" with an option to press Esc to abort. Workspaces moves through the Mac's virtual desktops, launching and repositioning each saved app — including Claude, iTerm2, QuickTime, and Docker Desktop — onto its assigned desktop. The panel's status updates to "Closing apps on wrong spaces…" as cleanup finishes, and the full layout is restored within seconds.
-
Download and install
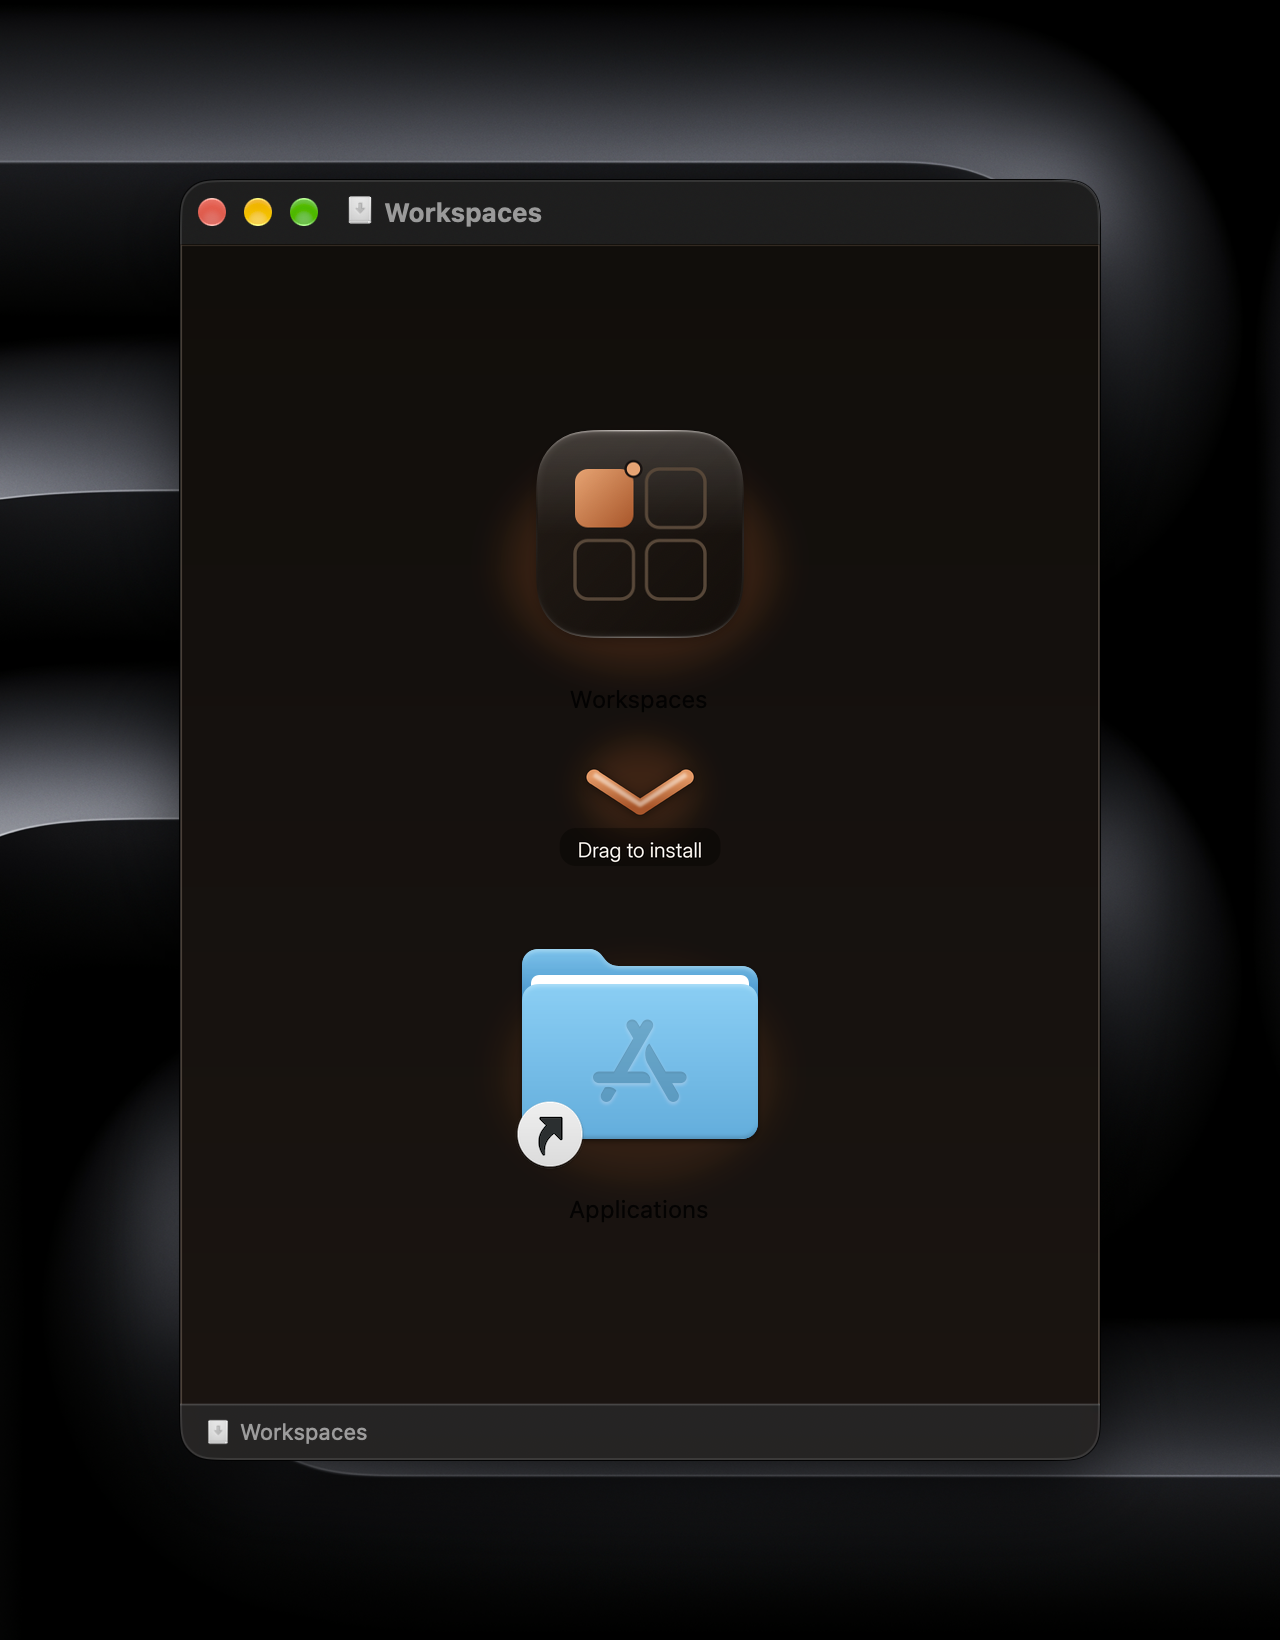
Download the DMG from the button above, open it, and drag Workspaces to your Applications folder. Double-click to launch. It lives in your menu bar — no Dock icon, no clutter.
-
Grant permission
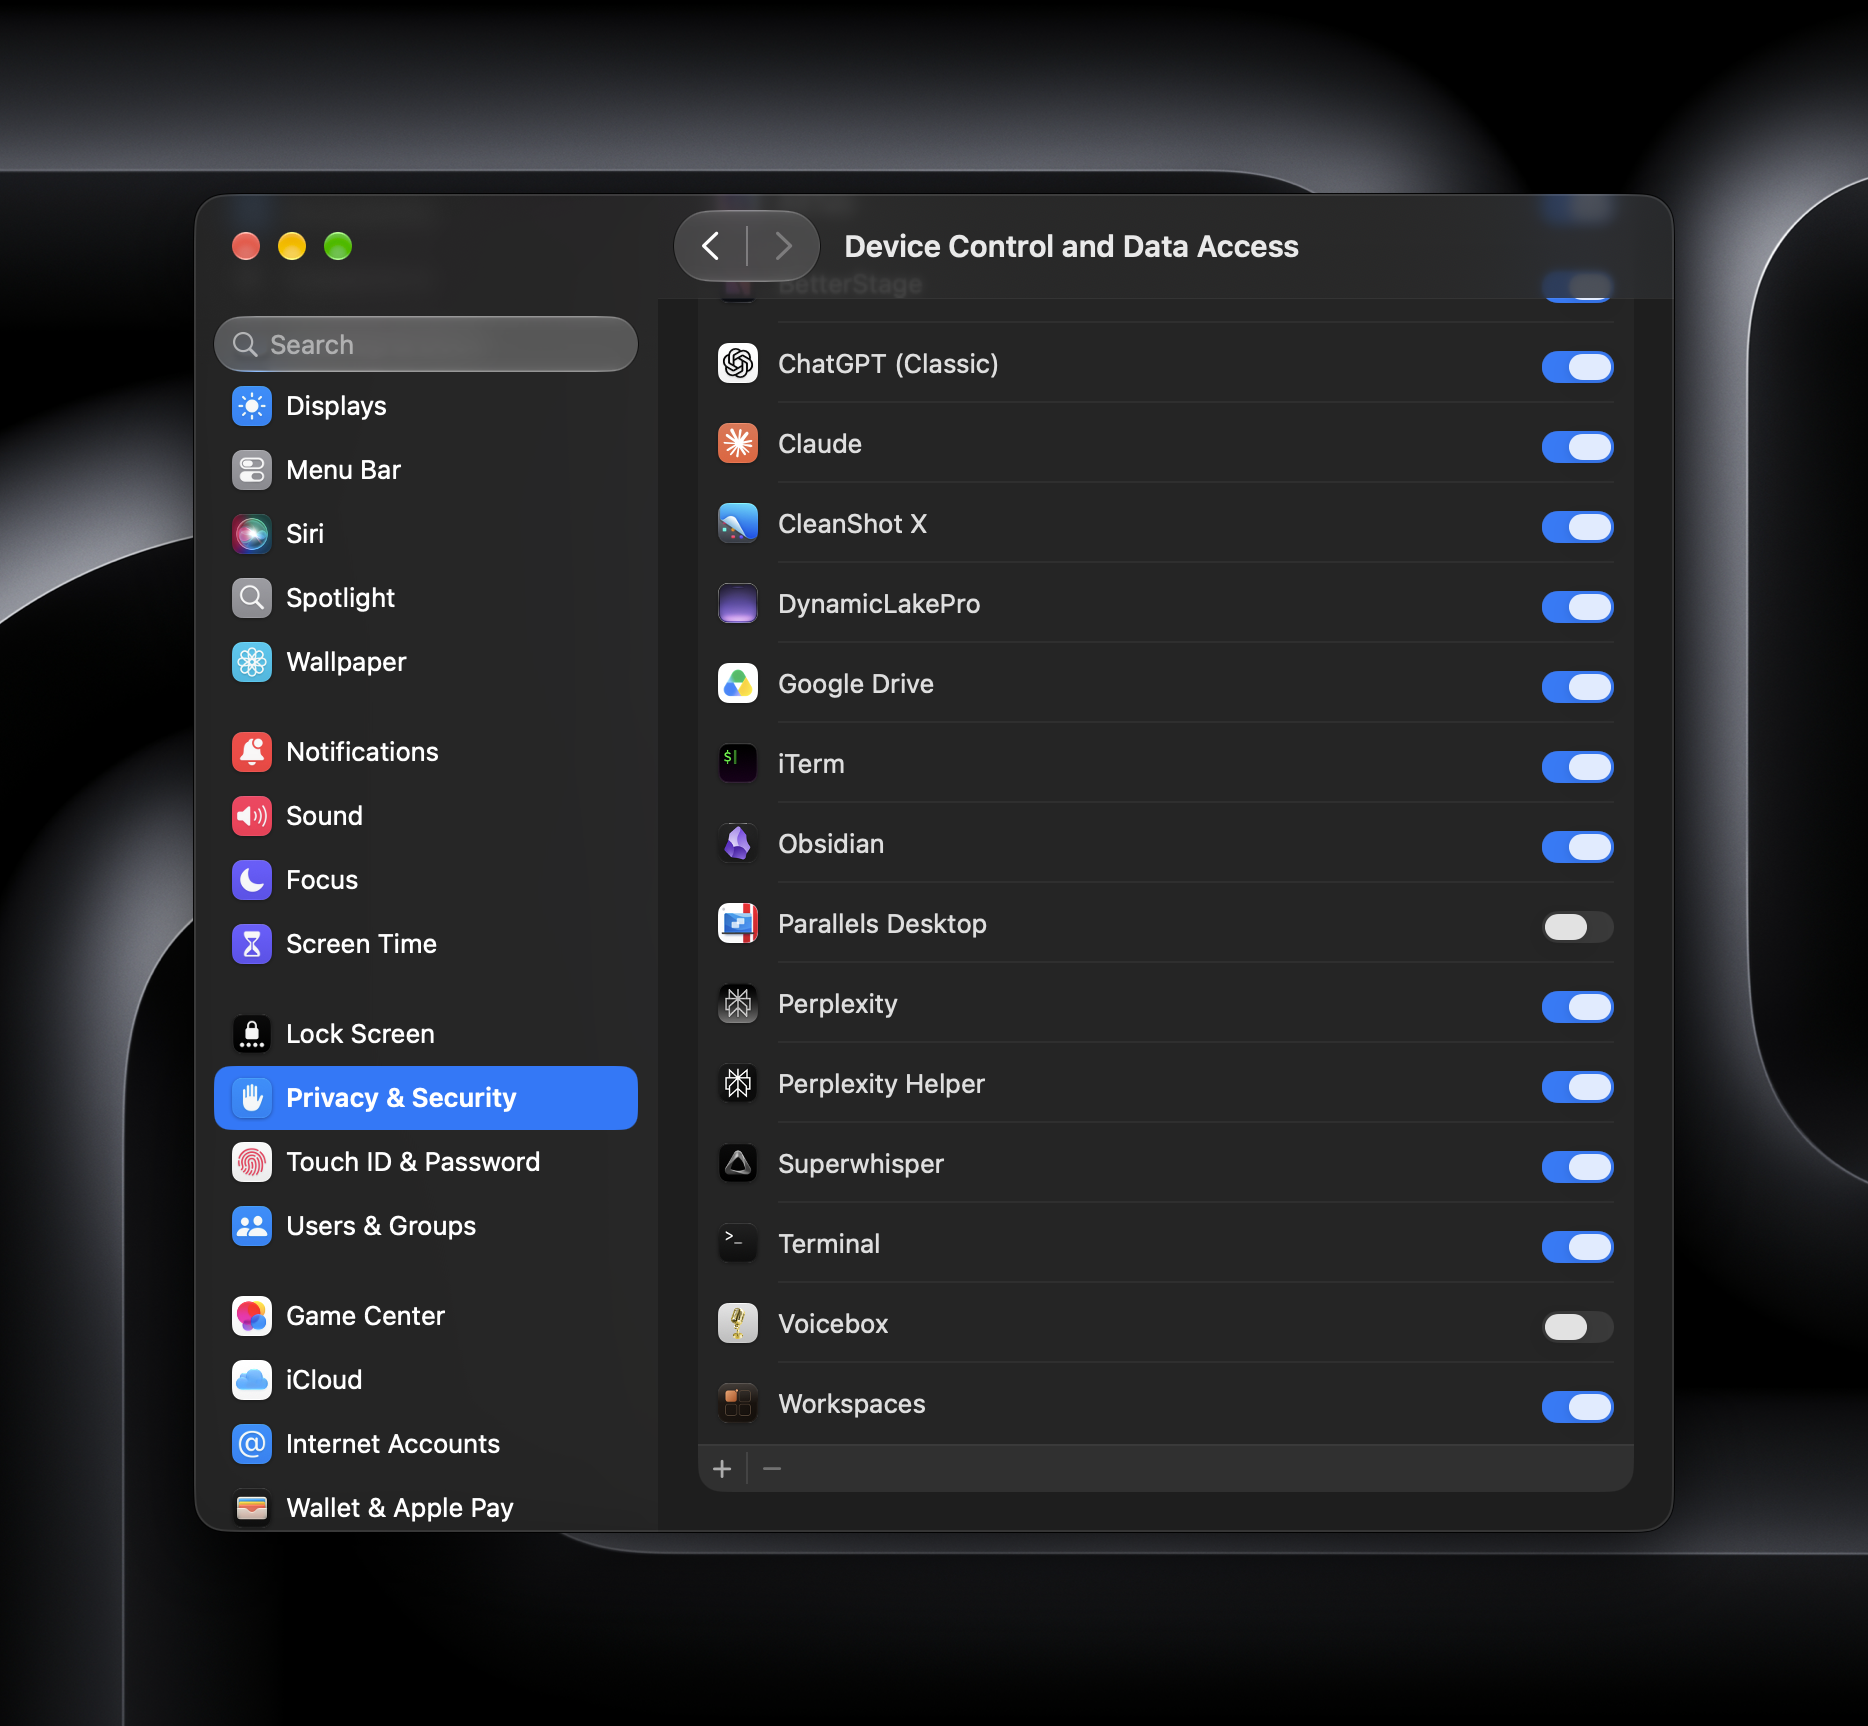
macOS will prompt you to allow Workspaces to read and move your windows. Click Open System Settings in the prompt, find Workspaces in the list under Privacy & Security, and toggle it on. You only do this once. (The exact category name varies by macOS version — "Accessibility" on older systems, "Device Control and Data Access" on newer ones.)
-
Arrange your apps across Spaces
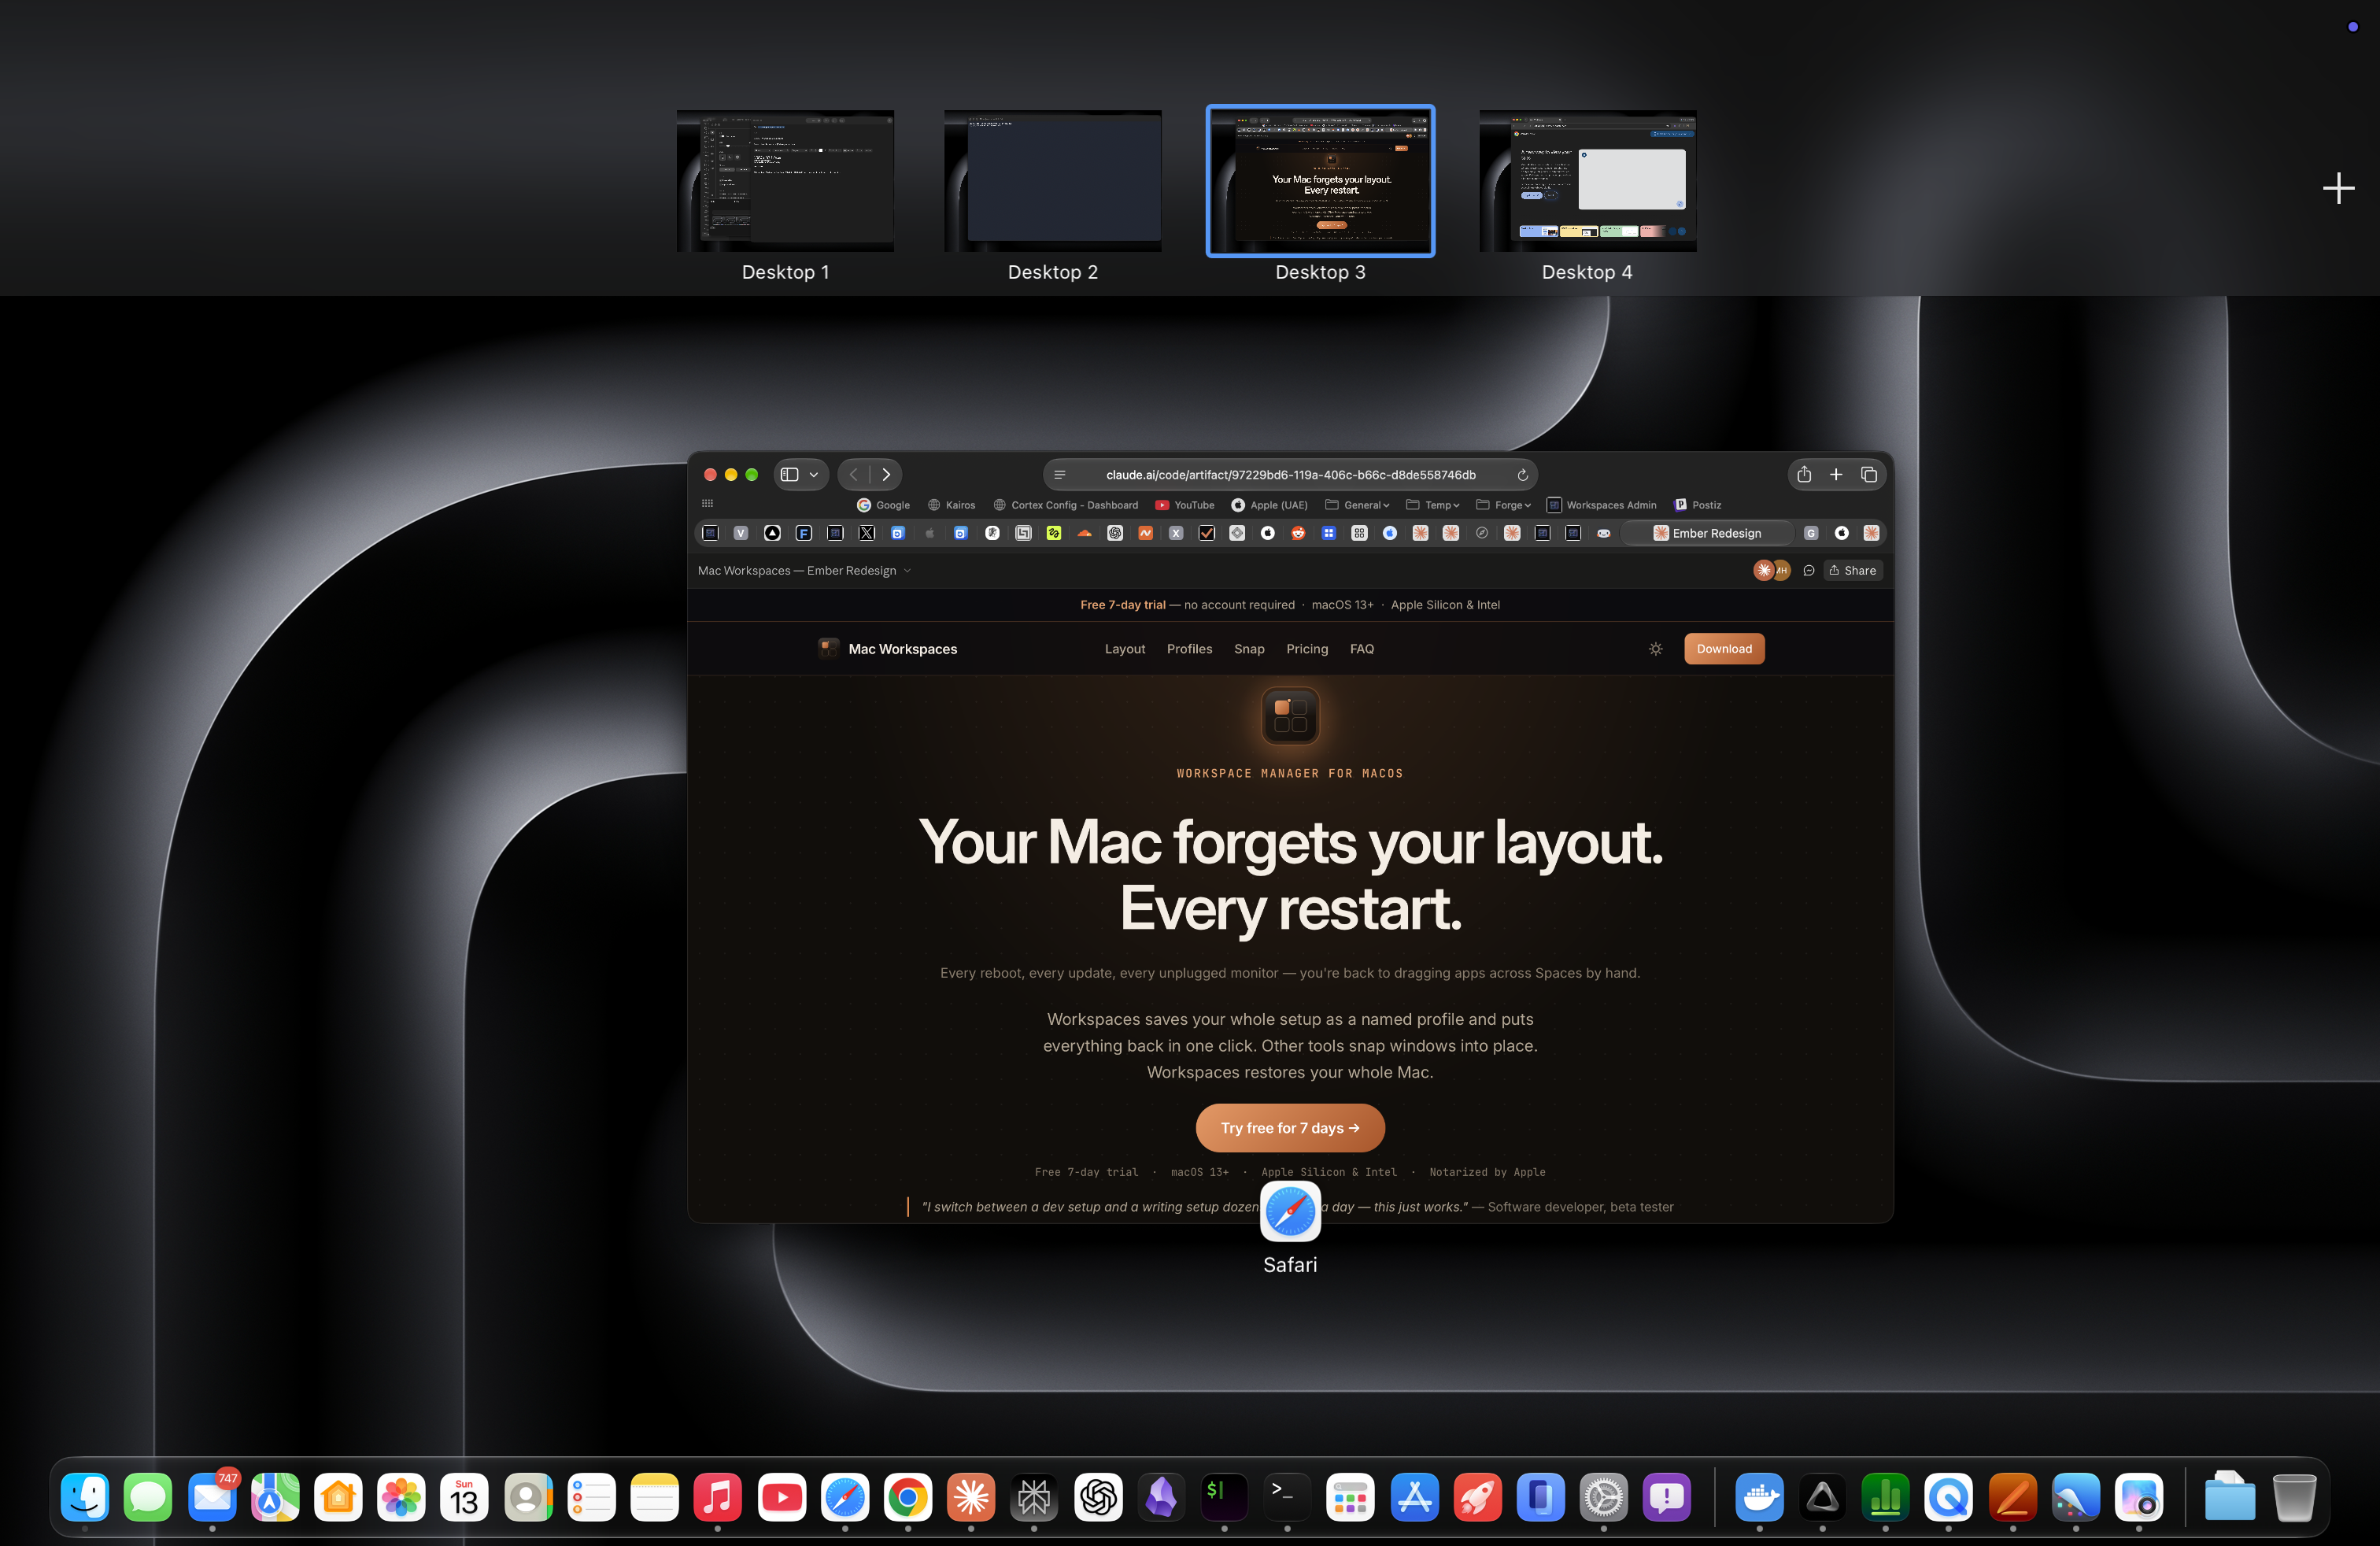
Open your apps and spread them across Mission Control Spaces the way you want them — Safari on Space 1, a code editor on Space 2, Figma on Space 3. Get one context exactly right: Work, Design, Calls — whatever matters to you.
-
Save your layout
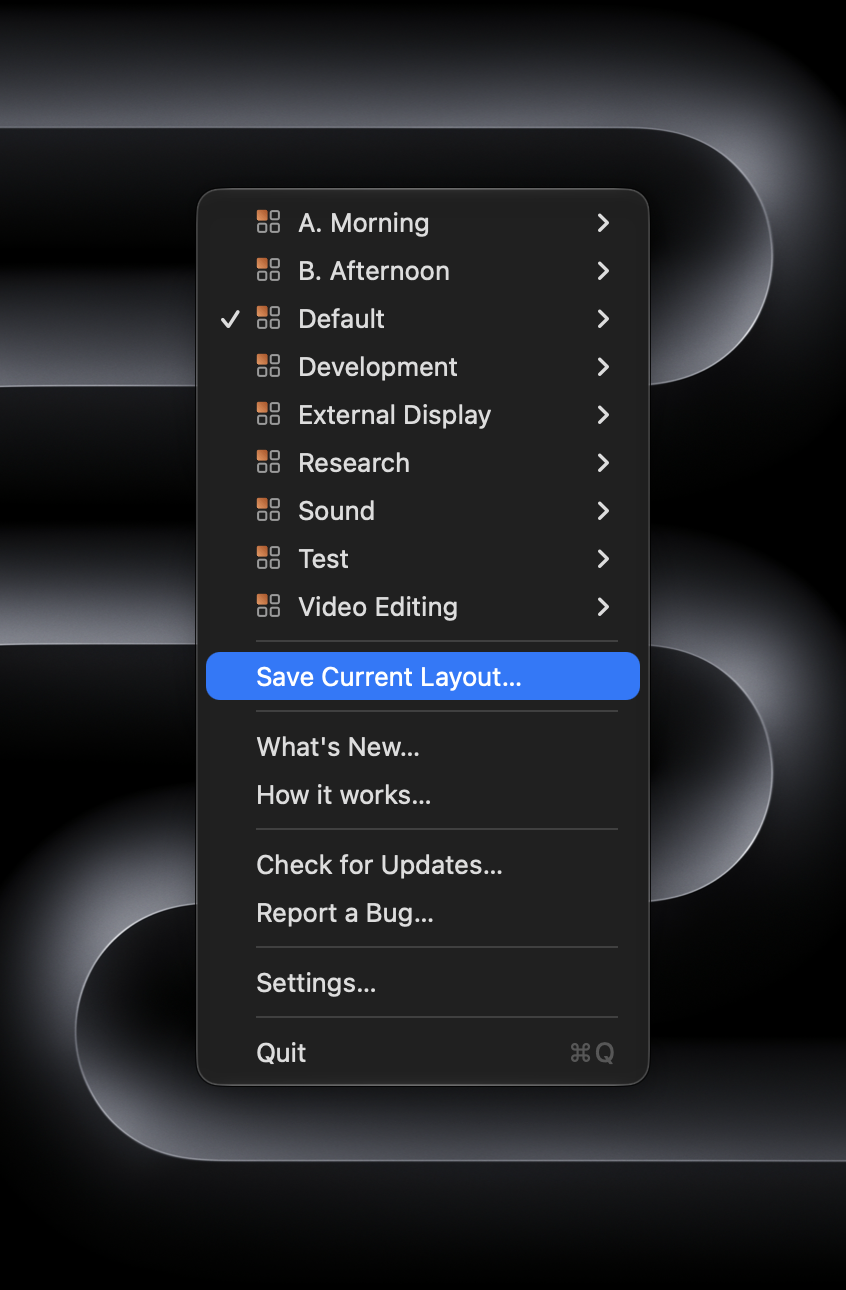
Click the Workspaces icon in your menu bar, then click Save Current Layout…. Give the profile a name. That's it — every app's Space and window position is saved.
-
Restore with one click
Click the menu bar icon, then click your saved profile name. Every app returns to its Space and every window lands in position — across monitors, apps, and Spaces. Apps not in this profile are hidden and stay running in the background.
Set your layout to restore at login
You can designate one profile to restore automatically every time you log in. Your apps will open straight onto their Spaces — no manual restore needed.
-
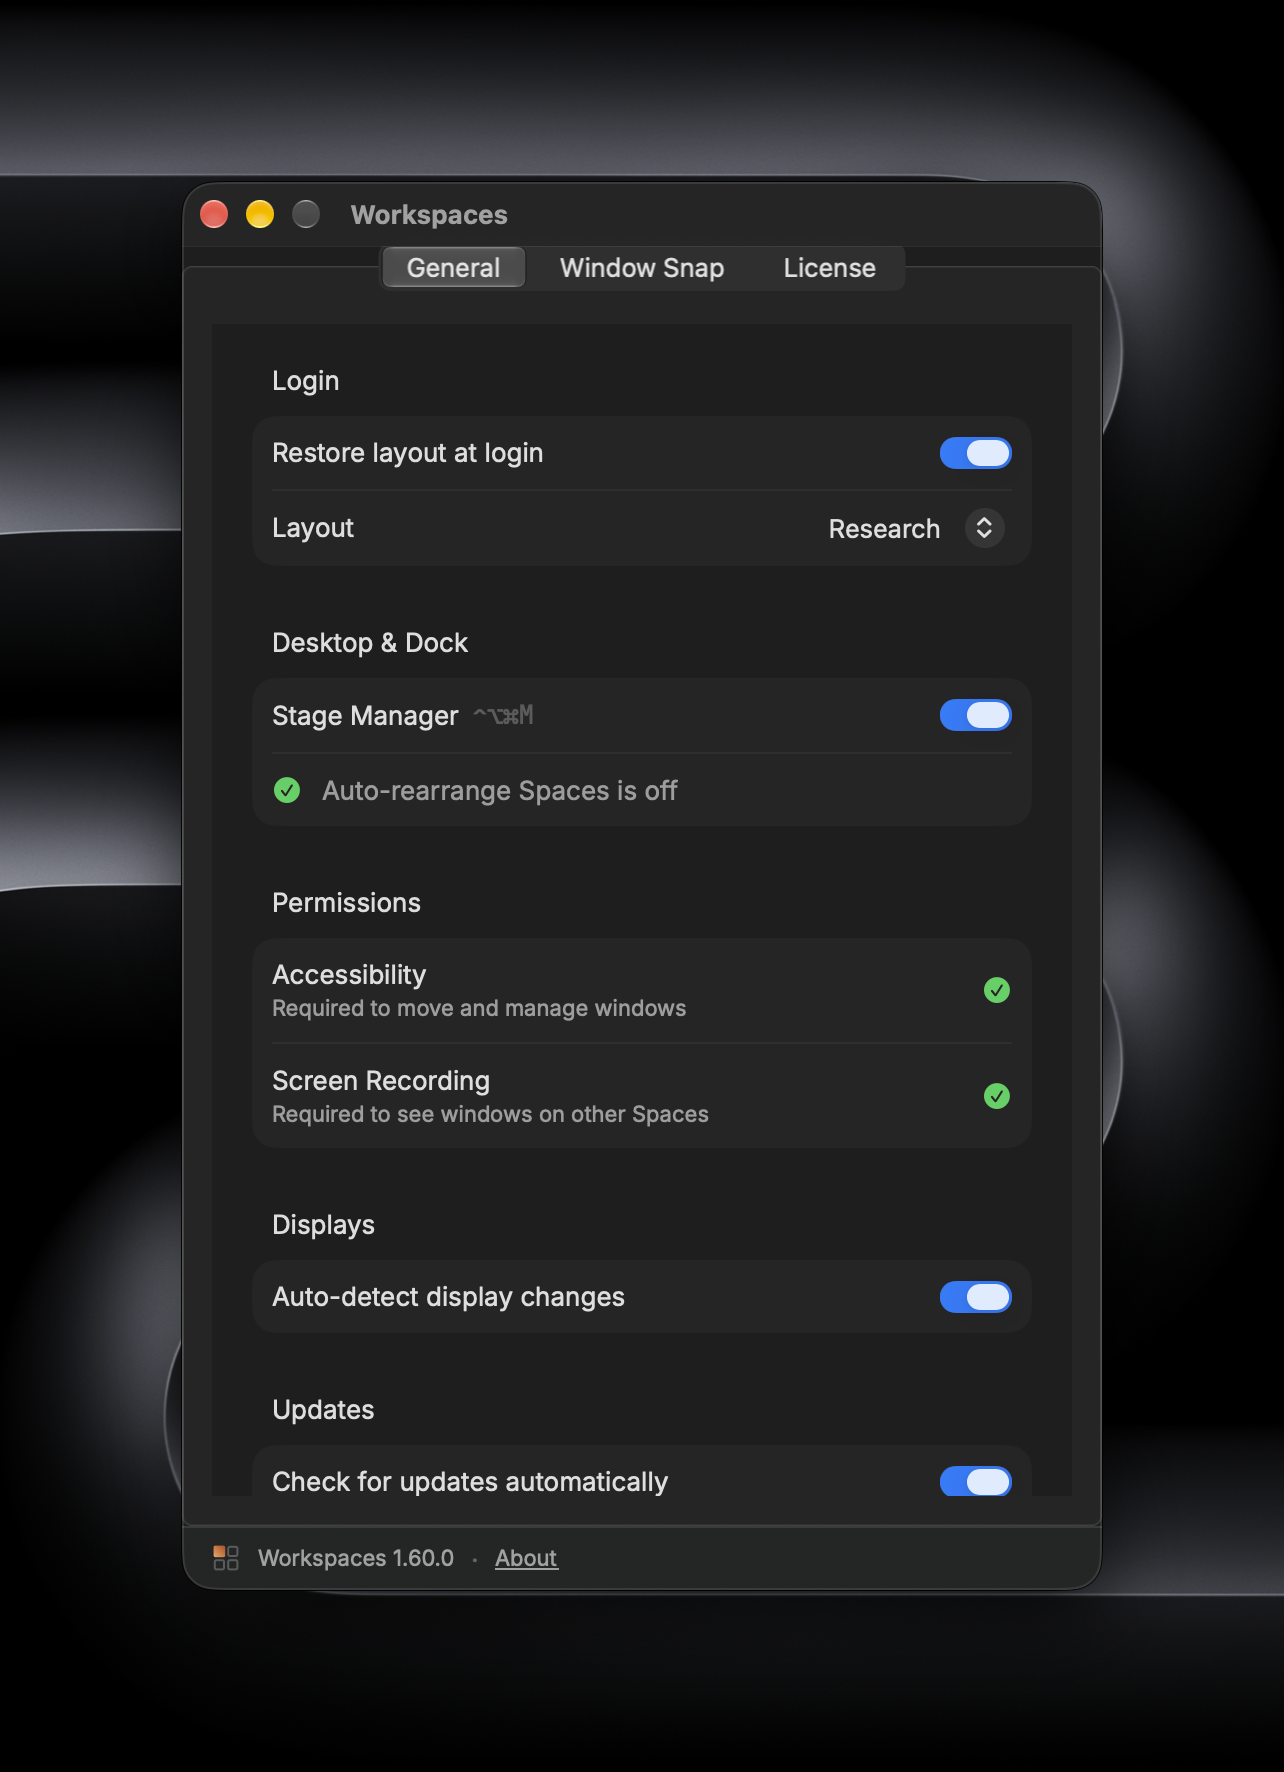
Open Settings
Click the Workspaces menu bar icon and choose Settings… (or press ⌘,).
-
Choose a login profile
In Settings, find Restore at login and select which profile to apply. It will add itself to the Login Items automatically.
-
Restart and it's done
Log out and back in (or restart). Shortly after login, Workspaces relaunches every app and places it on its Space. Your layout is just there.
Common questions
Does macOS need to have Spaces pre-created?
No. Workspaces reads the Spaces you have and matches apps to them by name (Desktop 1, Desktop 2, etc.). If you've saved a profile that uses 4 Spaces and you currently only have 2, it will create the missing Spaces automatically on restore.
A window didn't move to the right Space — what happened?
A few things can interfere: apps set to "Assign to all desktops" in Mission Control (right-click the Dock icon to check), full-screen apps (take them out of full screen first), and apps that are slow to launch. Try the restore again once the app has fully loaded. If a specific app consistently fails, contact support.
Does "Displays have separate Spaces" need to be on?
Yes — Workspaces requires System Settings → Desktop & Dock → Displays have separate Spaces to be enabled. This is the default on macOS; most users have it on already. If it's off, Workspaces will show a warning on launch.
Will this work if I have Stage Manager on?
Yes. Workspaces works with Stage Manager on. Profiles save and restore which desktop each app is on and where each window sits, regardless of whether Stage Manager is active.
How do I uninstall Workspaces?
Quit the app from the menu bar (Settings → Quit), then delete Workspaces.app from your Applications folder. To remove all data, also delete ~/Library/Application Support/Workspaces/ and the Login Item ~/Library/LaunchAgents/com.macworkspaces.workspaces.plist.